|
FREE CROCHET PATTERN-
Guitar Pick Holder Keychain |
Well, today is the day! My very first original, FREE CROCHET PATTERN is ready for you guys! I created this Guitar Pick Holder Keychain pattern last year, but it's just been sitting in a spiral notebook just waiting to be shared. Almost ALL of the crochet knowledge I have gained has been from FREE patterns and tutorials that I found online. I would not be where I am today with my crochet business, if it wasn't for the hard work of others. Now that I have gone through the whole process of writing and publishing a pattern online, I have even more respect for the amazing people who have published so many before me. A million thank yous to each and every one of you!! It is because of you that I feel inclined to give back was has been so freely given to me...
 |
Tribute to Paul Stanley of KISS
made for my future bro-n-law! |
This past Christmas, I wanted to create something special for my future
brother-in-law. He's my Honey's big brother and I love him dearly. He's a rocker through and through and deserved something really unique as a gift! After a lot of thought, I decided on a Crochet Guitar Pick Holder for his keychain. My Honey has a leather one, but I'm no leather worker. I
looked everywhere for a pattern like this and couldn’t find one. We know a ton
of people who play guitar or bass… so, there’s got to be other people out there looking
for a similar pattern. As soon as I wrote the pattern, I knew it was destined to go online!
 Guitar Pick Holder Keychain Crochet Pattern
Written By:
Brittany “Bee” Williams
Supplies:
3mm hook (a small hook keeps everything nice and tight!)
Med. Worsted Weight yarn (I used Red Heart Super Saver)
Large yarn needle for sewing in ends
Small snap and embroidery thread for sewing
Key ring of your choice
Abbreviations:
SC= single crochet
FO= finish off or cut yarn
SK1= skip 1st stitch
SC2TOG= single crochet two stitches together
SLST= slipstitch
For this piece, I chose to not use the “CH1 and turn” method
to finish off each row. If I am starting an increase row, I like to skip the
CH1, and just turn at the end of each row without it. I prefer this method in
almost all of my work. If it makes you nervous, feel free to apply a CH1 as
needed at the end of every row.
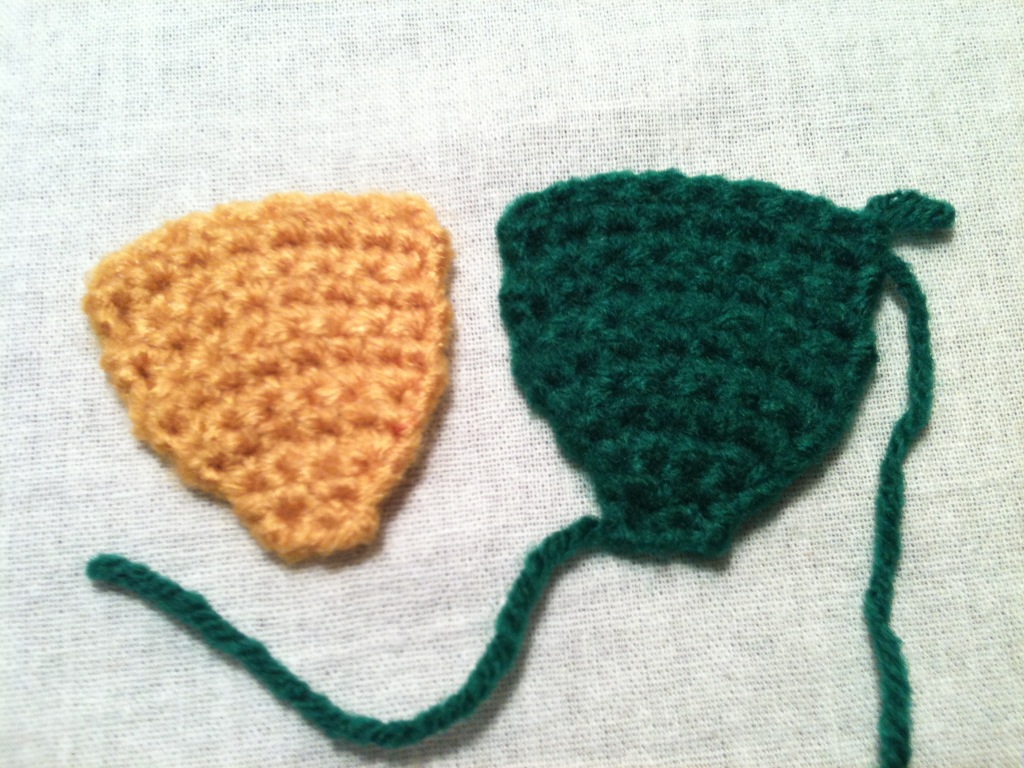
CH3
1- Using the back bumps, place 1SC in 2nd
ch from hook and in last. (2)
2- 2SC in each (4)
3- 2SC, SC,
SC, 2SC (6)
4- 1SC in each (6)
5- 2SC, SC, SC,
SC, SC,
2SC (8)
6- 1SC in each (8)
7- 1SC in each (8)
8- 1SC in each (8)
9- 1SC in each (8)
10- 1SC in each, FO (8)
Make another piece exactly like that (rows 1-10) but
DO NOT FO at the end of row 10!
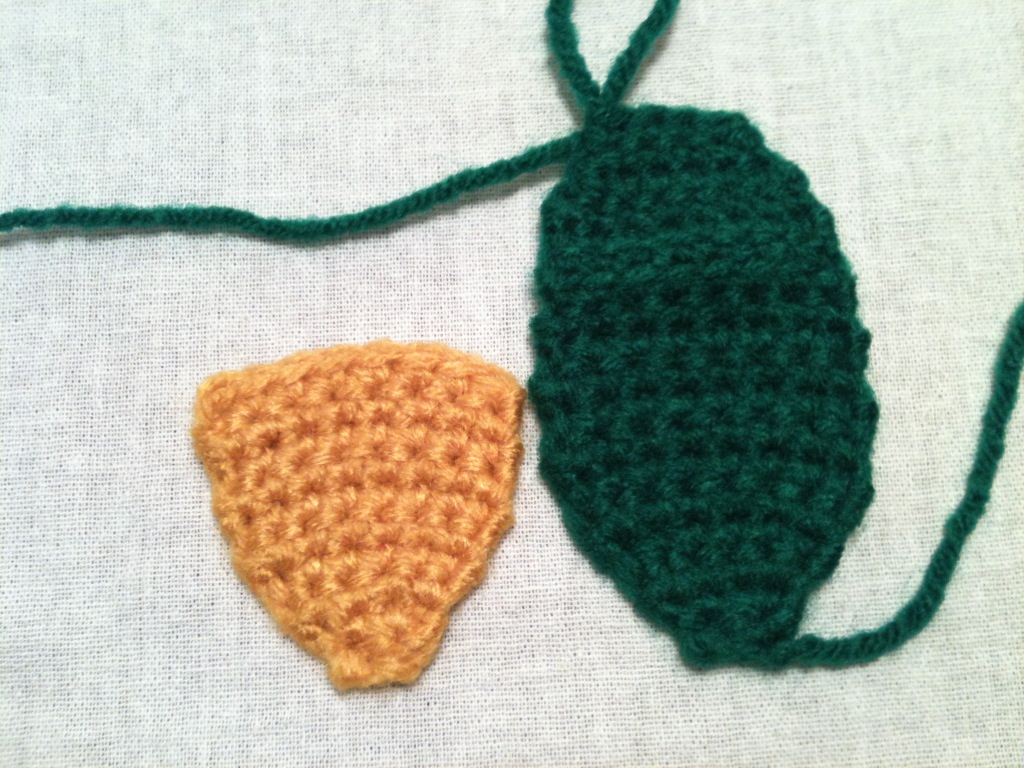
Add these rows to the 2
nd piece:
11- 1SC in each (8)
12- 1SC in each (8)
13- To create a ridge for the flap, work in Front Loops Only, 1SC in each (8)
14- 1SC in each (8)
15- 1SC in each (8)
16- SK1, 1SC in next 5 stitches, SC2TOG, CH1, turn (6)
17- SK1, 1SC in next 3 stitches, SC2TOG, CH1, turn (4)
18- 1SC in each. Do NOT cut yarn unless you are changing colors (4)
Sew in the yarn ends of both pieces. Place the two pieces
together with the “wrong sides” facing. Make sure that the ridge that you
formed in row 13 is facing outside.
19- Now, CH1 and SC down the top edge of the bigger piece.
When you run into the bottom piece, start to SC the two pieces together.
When you reach the bottom of the pick holder, you have a few
options:
a- SC
evenly across the bottom with no keychain loops
b- CH4,
SLST (1 loop) and then continue to SC up the other side of the two pieces.
c- **Preferred** Working through the
two SC at the bottom of each piece… (SLST in first SC, CH4, SLST in same SC) (SLST
in 2
nd SC, CH4, SLST in same SC) (2 loops)
I prefer this method because it
allows the key ring to pass through 2 loops. This is more secure AND forces the
Pick Holder to stay “in line” with your keys. My Honey is a professional guitar
player and personally requested his to be made this way. (See Picture)
Then, continue to SC up the other side of
the two pieces. After I SC both pieces
together and make my way back up to the top of the piece, I like to finish the
piece by putting a SLST in each of the 4 stitches from row 18 and then FO.
I think this gives the flap end a little
sturdiness.
Next on the list, sew a snap onto the holder! I use a small
snap, but one that is strong enough to have a good hold. You want to sew one
side of the snap onto the flap and the other side of the snap onto the bottom
piece. Just make sure that they line up! I messed up my first try! lol
 |
My tribute to Paul Stanley...
with the flap up, it looks like his hair! |
Final touch is adding the key ring. This part can be tricky,
even for my tiny fingers. If you chose to add one loop, that’s easy enough to
figure out. If you chose two loops, you want to make sure that the key ring
passes through BOTH of the loops. Make sure that you get it through the loop
and not through one of the individual chains.
If you chose not to add a loop at the bottom of your Pick
Holder, you could always just throw it into your purse or guitar bag! Carry it
in your back pocket? Maybe affix the Pick Holder to your guitar strap or an arm
band?
Now, get to personalizing! Add a heart or flower! Embroider
a design or monogram! Take it to the next level and make it a tribute to Paul
Stanley from KISS!
©2013 Brittany
Williams/Bee’s Booties and More, all rights reserved. You may sell items you
make with this crochet pattern. You may not sell this crochet pattern or claim
it as your own. You may publish or post a link to this crochet pattern, but you
may not publish or post this crochet pattern in whole or in part.
I hope that you enjoy this awesome FREE pattern! If you like the pattern, please share it with your friends! Thank you, again, to everyone in the crochet community who publishes free patterns!
Warmest Regards,
Bee
Follow me on Pinterest! This Bee's Honey Pinterest


 Guitar Pick Holder Keychain Crochet Pattern